https://www.extensionsbychristy.com/blogs/news.atom extensionsbychristy - BLOG POSTS & ARTICLES 2023-07-14T20:08:37-07:00 extensionsbychristy https://www.extensionsbychristy.com/blogs/news/what-seeds-to-start-now-for-a-fall-garden 2023-07-14T20:08:37-07:00 2023-07-16T04:11:07-07:00 Start these NOW for a fall garden! Christopher Surabian
Summer will soon be over but having a thriving vegetable garden doesn't have to end when summer does. With a little bit of planning, and preparation you can grow vegetables well into the winter months or even year round if you live in a warmer climate down south.

Seeds you can plant now will only become sweeter and more delicious if they go through a frost!

When a frost comes into contact with a lot of these cool-season vegetables, they naturally react to the cold and produce extra sugars which can make some of the more bitter tasting vegetables taste rather sweet. 

Prepare NOW to have the garden you've always wanted during Fall/Winter! With these crops, put the fear of your plants being damaged or destroyed aside. When Winter weather rolls around, these vegetables will grow well & actually THRIVE!
 
Here are just a few of our most popular articles and blog posts regarding Fall and Winter gardening:
Plant these seeds in July/August - View

Planning a Fall/Winter Garden ... Step-by-Step - View
 
Tips for Starting Your First Fall Garden - View

Most Popular Seeds to Plant for Fall/Winter Gardening - View
 
5 Fall Vegetables Worth Growing In Containers This Year - View
 
19 Frost Hardy Vegetables to Plant this Fall - View
 
Fall and Winter Gardening Made Easy - View
 
Our TOP 10 Favorite Fall & Winter Gardening YouTube Videos! - View
 
QUICK GROWING CROPS for a FALL & WINTER Garden - View


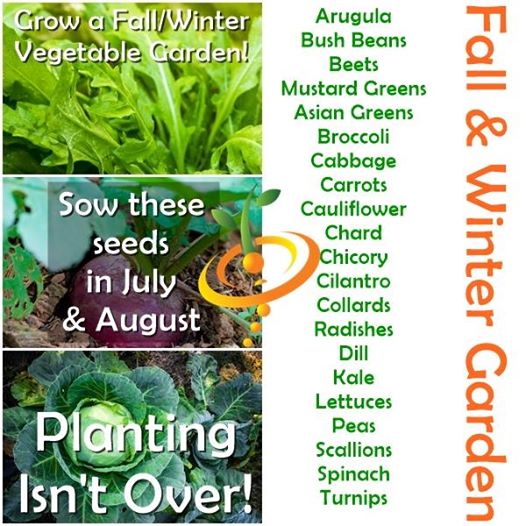
Most Popular Seeds to Plant for a Fall/Winter Harvest:


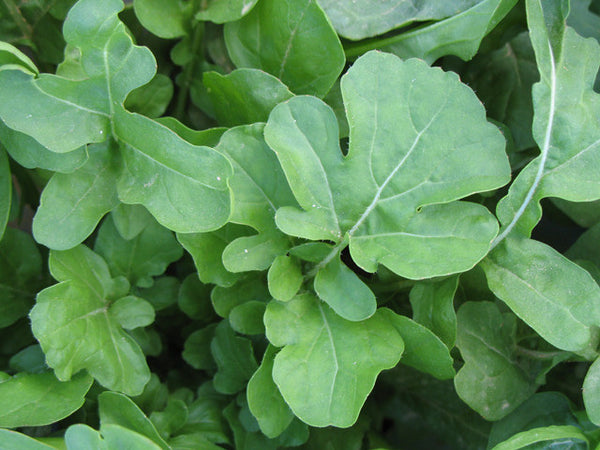
Arugula:
arugula seeds

Beans (Bush): bean seeds

Beets: beet seeds

Mustard Greens: mustard seeds

Broccoli: broccoli seeds

Cabbage: cabbage seeds

Cauliflower: cauliflower seeds

Chard: chard seeds

Chicory: chicory seeds

Cilantro: cilantro seeds

Collards: collard seeds

Radish: radish seeds

Dill: dill seeds

Kale: kale seeds

Lettuce: lettuce seeds

Peas: pea seeds

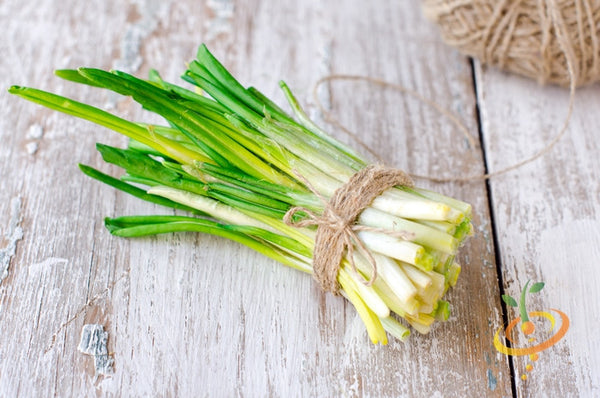
Scallions & Bunching Onions: scallion seeds

Spinach: spinach seeds

Turnip: turnip seeds 
NEW PRODUCT!  All-in-One Fall/Winter Seed Bank]]>
https://www.extensionsbychristy.com/blogs/news/how-many-plants-can-you-grow-in-a-12-container-1 2022-12-18T18:02:27-08:00 2022-12-25T06:38:02-08:00 How Many Plants a 12″ Container? Christopher Surabian

Here is a suggested number of plants that will grow successfully in a 12″ container. It would be a waste of money and time to start more seeds than you’ll need so here’s a simple guideline of where to get started.

Growing in containers is a fun and easy way to start vegetable gardening. They are ideal for anyone with a patio, balcony or rooftop garden. They also are popular among those who rent their home.

Ready to Learn MORE About Gardening In Small Spaces?

9 Of The Best Vegetables To Grow In Small Gardens

5 Vegetables To Grow In Containers This Fall

Tips For Successfully Starting Your Seeds Indoors

5 Tips For Growing Herbs In Containers

]]>
https://www.extensionsbychristy.com/blogs/news/your-garden-zodiac-signs 2022-06-04T08:23:21-07:00 2022-06-04T08:24:39-07:00 YOUR GARDEN ZODIAC SIGNS Christopher Surabian ]]> https://www.extensionsbychristy.com/blogs/news/why-wont-my-root-veggies-grow 2022-04-13T17:49:06-07:00 2022-04-14T16:33:26-07:00 Why Won't My Root Veggies Grow? Christopher Surabian You’ve put in all the work, planted your root veggies with care and all season you’ve been eyeing their gorgeous leafy green tops and waited with anticipation for harvest time.  Then you go and start pulling up scrawny, diseased or misshapen root crops. Disappointed, you wonder where you went wrong.  Here are some common problems associated with growing root vegetables and important questions to consider.
 

Too much on the acid or alkaline side?

This is a very common problem that most gardeners aren’t aware of when growing their root vegetables. It is important to have your pH tested if you plan on getting “near perfect” root crops.  All root vegetables, except beets and parsnips, grow best in soils with a pH of 6.2–6.8; beets and parsnips require a pH of 6.6–7.2.  A soil test kit or portable meter will help you determine your soil's pH level.

Is your soil sandy or too compact?

Soggy & compact soils can cause rot and oddly shaped roots.  Loose soil will create straighter root veggies. Sandy soils are ideal, but your root crops will need more frequent watering.  Consider yourself lucky if your soil is sandy, you’ll have very little trouble growing your favorite root crops.  To only further your success you’ll have with sandy soil, add in organic matter such as aged manure or finished compost. Mulch around your plants, which will help the soil retain moisture and keep cool. 

Are your nutrients off-balance?

Root crops require about 1⁄3 pound of actual nitrogen, 1⁄4 pound of phosphorus, and 1⁄3 to 1⁄2 pound of potash per 100 square feet.  Plant them in the same area you do your leafy vegetables which generally requires the same type of nutrients. This will make fertilizing and amending the soil much easier.

Are the plants getting enough sun and water?

Root veggies like carrots, radishes, beetsparsnips, need at least a half day of sunshine. They also need at least 1 inch of water from rainfall or manual watering each week during the growing season. This may need to be increased if your soil is sandy and drains or drys out quickly.  

]]>
https://www.extensionsbychristy.com/blogs/news/seed-planting-spacing-cheat-sheet 2022-03-04T14:01:19-08:00 2022-03-05T09:13:34-08:00 Seed Planting & Spacing Guide (printable) Christopher Surabian GO BACK TO GROW GUIDES


Here is a cheat sheet you can save to reference all of the planting and spacing specs for each of your seeds. Click on the image below to view it in a larger format.  Print it and save it! 


]]>
https://www.extensionsbychristy.com/blogs/news/38-edible-flowers-to-plant-in-your-garden 2022-02-25T09:42:04-08:00 2023-03-18T05:12:08-07:00 38 Edible Flowers To Plant In Your Garden Christopher Surabian

Try growing these 38 edible flowers!  Not only will you help provide nectar for friendly pollinators in your garden, but you'll have fragrant, and delicious blooms that you can enjoy adding to your favorite culinary dishes. They look great, and taste great, too!

IMPORTANT: The seeds can be extremely potent and extensionsbychristy does not take any responsibility for any adverse effects from the use of such seeds and/or plants. Always seek advice from a professional before growing and/or consuming seeds and/or plants for medicinal purposes.

1.   Angelica

2.   Anise

3.   Arugula

4.   Bachelor's Button (COMING SOON)

5.   Basil

6.   Bee Balm (aka Lemon Balm)

7.   Borage

8.   Carnations (COMING SOON)

9.   Chamomile

10. Chervil

11. Chicory

12. Chrysanthemum

13. Cilantro

14. Clover

15. Dandelion

16. Daisy

17. Dill

18. Fennel

19. Garlic Chives


20.  Hollyhocks

21.  Jump-ups (COMING SOON)

22.  Lavender

23.  Leek

24.  Lovage

25.  Marigold

26.  Mint

27.  Nasturtium

28.  Oregano

29.  Pumpkin

30.  Radish

31. Rosemary

32. Sage

33. Summer Savory

34. Snapdragon

35. Squash

36. Sunflower

37. Sweet Woodruff

38. Violets (COMING SOON)

]]>
https://www.extensionsbychristy.com/blogs/news/thinning-your-seedlings 2022-02-02T14:22:48-08:00 2022-02-02T14:26:08-08:00 Thinning your Seedlings Christopher Surabian
For detailed plant spacing info please visit:  https://www.extensionsbychristy.com/pages/grow-guide-table-of-contents


If, like most gardeners, you want to make sure to have good, full rows of plants, you will probably want to thin at least some of your vegetables, flowers, and herbs.

What is "thinning"?

You prepare for thinning by planting seeds more densely (meaning closer together) than you actually want your plants to grow. After the plants emerge from the soil, let them grow for a little while (a week or two, for most crops), then take out some of the plants such that the remaining plants (the biggest, healthiest looking ones) are approximately the distance apart recommended.

Why is it so important?

While you may think you don’t want to waste seeds, seeds are generally inexpensive. It’s much better to plant seeds thickly and need to thin the resulting plants than to plant seeds far apart and find that too few of them have germinated to give you the crop you want.

Seeds also must literally push their way out of the soil. If you plant them close together, they help each other with this sometimes very difficult task.


In some cases, the plants that you take out while you’re thinning can be transplanted elsewhere if desired. Broccolicabbagekale, and their relatives fit in this category, as do a variety of other plants.

In other cases, the plants you take out should just be added to the compost pile. Beetscarrotsparsnipscucumbersmelons, and squash are among the plants that cannot be taken out and planted elsewhere.

If you plant seeds densely, it is very important to make sure that you do thin the plants out. If you don’t, the plants will be too close together and will compete with each other for light, water, and nutrients. They will stay small and will not produce much of what you want (leaf, fruit, root, etc.).

A variation on thinning is the planting of plants in a small, dense seedbed. If, for example, you want to create warm growing conditions for basil seedlings, you can plant 50 or 100 seeds very close together (say, in a square 60 cm/24 in on a side), then cover them with a cold frame (see season extension techniques) or a floating row cover. When the plants are about 10 cm (4 in) tall, you can dig them all up and transplant them into rows so they are about 60 cm (24 in) apart. Once they’re that big, they can live without the extra heat.

Something similar is also commonly done for broccoli, cauliflower, cabbage, kale, collards, and related plants. For these plants, the purpose of the cover is not extra heat but protection from flea beetles (see pests). The flea beetles can eat the very small seedlings to death, but not the larger transplants.

]]>
https://www.extensionsbychristy.com/blogs/news/coffee-grounds-in-the-garden 2022-02-02T14:20:59-08:00 2022-02-06T08:29:59-08:00 Coffee Grounds in the Garden Christopher Surabian
 

Most vegetables tend to grow better in soil that falls near a neutral or near-neutral soil pH.  Some of your most favorite vegetables and herbs will adapt when growing in acidic soil, however there are some that actually prefer slightly acidic soil.

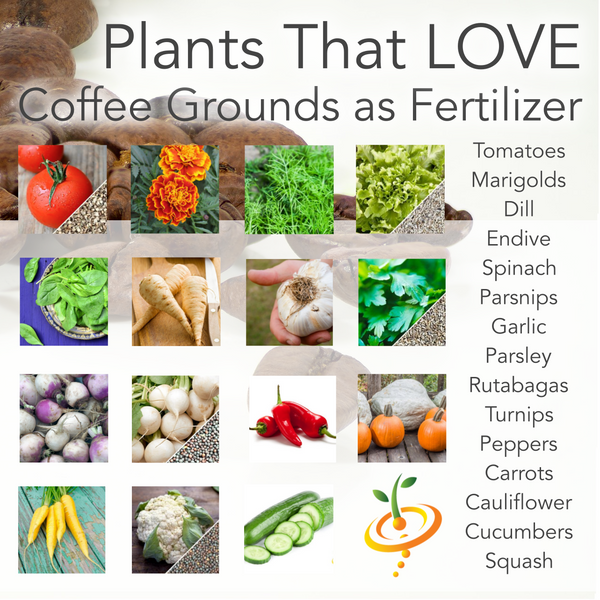
If you want to amend your soil and slightly improve the acidity for these varieties to thrive, try mixing in a small amount of fresh, (un-used) coffee grounds into the soil around these "acid-loving" plants. (Tomatoes, Marigolds, Dill, Endive,  Spinach, Parsnips, Garlic, Parsley, Rutabagas, Turnips, Peppers (HOT) & (Sweet), Carrots, Cauliflower, Cucumbers, and Squash.)

Once you determine whether you want to apply "a little" or "a lot" of acidity via your coffee grounds you're ready to start using this readily available fertilizer in your garden. 

TIP:  Scroll down to the bottom of this post to read even more ways you can coffee grounds in your garden. For example, you can make a "tea" out of the used grounds to use as a spray to repel insects and caterpillars - naturally!

Most people would assume that used coffee grounds are very acidic, but tests on the pH of this natural fertilizer shows that they are only mildly acidic. These used grounds therefore make a good "side-dressing" to many plants because as they decompose they tend to return to a near neutral pH. This means your plants get an added boost of nutrients right away, and then they will slow down over time making your plants ready to be re-fertilized.  

Now fresh, un-brewed coffee grounds are more acidic than their brewed version. Because of this, they can be used slightly different in your garden. If you're growing things that don't mind the extra boost of acidity, then apply new grounds.

⚠️ IMPORTANT: Don’t use coffee grounds that have fermented or rotted. Use fresh organic grounds. Drip grounds tend to work better than boiled grounds, as they are higher in nitrogen content. You can also sprinkle some of the used grounds around flowers and vegetables before watering them for a slow-release of nitrogen. Try buying compostable non bleached coffee filters, as this makes it easy to just throw both grinds and filters into your compost box.


More ways .... to use coffee grounds in your garden:

TIP #1 - Mix 1/2 pound of coffee grounds with 5 gallons of water to make for an instant liquid fertilizer for your grass or lawn.  For a quick fertilizing spray, dilute the grounds in purified water and spray directly on plants. Experts recommend using a half-pound of wet grounds to five-gallons of water. You can also directly sprinkle grounds into houseplant soil or in your outdoor vegetable boxes

TIP #2 -
Use small amounts to help suppress fungal rot or wilt, such as Fusarium, Pythium, and Sclerotinia species.
 
TIP #3 - Make a "tea" out of the used grounds to use as a spray to repel insects and caterpillars.  

TIP #4 - Spread around the base of your azaleas, hydrangeas, roses and lilies.

TIP #5 - Use grounds to suppress weeds in your garden. 

To use your coffee grounds as sheet mulch, simply dump them around the base of your plants and rake them out to a fine layer. If you get the layer too thick, you can count on it getting moldy.   

TIP #6 - Grounds can also work well as a natural deterrent for animals such as cats and rabbits. 

TIP #7 - Use as a Slug deterrent. If slugs are getting the best of your tender young leaves inside of your vegetable garden, try placing some used coffee grounds as a barrier on top of the soil around your plants. The rough grounds will scratch their little bodies making it uncomfortable for them to find their way onto your young and fragile new plants.

Tip #8 - Great for worm bins and composting!  Try letting your grounds sit for about 3 days before adding them into your worm bins or compost. The high nitrogen content in coffee grounds make for good worm food, but try to not overdo it. Limit the amount of grounds you add for a successful compost, especially when worms are involved.


]]>
https://www.extensionsbychristy.com/blogs/news/composting-dos-and-donts 2022-02-02T14:16:43-08:00 2022-02-02T14:17:06-08:00 Composting DO's and DON'Ts Christopher Surabian

Want to learn how to compost but confused as to what's appropriate to add and what's not?  Avoid adding items from the DON'T list, and start incorporating some of the items on this DO list. These items would otherwise end up in landfills, but by composting them you'll be able to return them to the soil in a useful form. Please also read:  Intro to Composting and How To Build a Compost Pile! 


Composting DON’Ts:

  • Meat
  • Cheese
  • Gravy
  • Butter
  • Frying Oils
  • Moldy Bread
  • Dog or Cat Poop
  • Ashes from BBQ
  • Old or Diseased Plants
  • Wet Grass
  • Fish
  • Bones
  • Citrus Peels that Have Been Chemically Sprayed
  • Glossy Paper
  • Sticky Labels


Composting DO’s:

  • Vegetables
  • Fruit
  • Freezer Burned Fruits or Veggies
  • Burlap Coffee Bags
  • Herbs
  • Non-wax Cardboard
  • Paper Bags
  • Cereal
  • Un-popped Popcorn
  • Alfalfa Hay
  • Peanut Shells
  • Cardboard Egg Containers
  • Old Luffa’s
  • Cotton Swabs with Cardboard Sticks (100% Cotton Only)
  • Spices
  • Spoiled Rice, Coconut, Soy and Almond Milk
  • Old Bills or Paper Mail
  • Dustpan Gatherings
  • Natural Potpourri
  • Wrapping Paper Rolls
  • Christmas Trees
  • Garland (Evergreen)
  • Feathers
  • Horse, Cow, Goat Manure
  • Stale Bread
  • Nut Shells
  • Coffee, Filters, Tea-Bags (If Made From Natural Products)
  • Rice
  • Paper
  • Napkins
  • Paper-towels
  • Grass Clippings
  • Wood Chips
  • Saw Dust (Not From Treated Wood)
  • Vacuum Cleaner Bag Contents
  • Dryer Lint
  • Pet Hair
  • Houseplant Trimmings

Composting is a great way to recycle unwanted items and trash by creating them into a nutrient rich soil...but think before you toss! When you add items from the list above, you'll create an unhealthy environment for your compost bin. You'll end up with a stinky, "over-heated" compost that will most likely even attract animals you don't want in your yard/garden. Plus, keeping toxic items out of the soil you plan on growing food in is always of importance!  Learn more: How To Build A Compost Pile

]]>
https://www.extensionsbychristy.com/blogs/news/pepper-scoville-heat-scale 2022-02-02T14:10:22-08:00 2023-04-11T19:03:20-07:00 Pepper Scoville Heat Scale Christopher Surabian More

]]>
The Scoville scale is a measurement of the spicy heat of chili peppers.  Here is a heat index for all your hot peppers.
]]>
https://www.extensionsbychristy.com/blogs/news/kill-slugs-with-beer 2022-02-02T14:05:44-08:00 2022-02-02T14:05:45-08:00 Kill Slugs with Beer 🍺 Christopher Surabian

One of the simplest ways to get rid of slugs is to pour them a beer. Literally.  Make sure to not waste a yummy and delicious beer on these nasty garden pests though. An inexpensive, cheap beer will do the job just as well as your favorite will.
 
Bury a small bowl in your garden, near plants that seem to be attracting the slugs. You'll want the lip of the bowl to be level with the soil.   Now crack open a beer, and fill the bowl.


]]>
https://www.extensionsbychristy.com/blogs/news/15-popular-medicinal-herbs-to-make-tea 2022-02-02T14:01:56-08:00 2022-03-03T16:11:30-08:00 Popular Medicinal Herbs for Tea Making ☕ Christopher Surabian
These 15 herbs will make a wonderful addition to your collection of "tea making supplies"!  Start curing your ailments naturally by growing your own herbal remedies. You can use them individually or mix and match to create unique tones and flavors that are suitable to your own liking.    ⚠️ IMPORTANT, PLEASE READ:  These seeds can be extremely potent. extensionsbychristy does not take any responsibility for any adverse effects from the use of such seeds and/or plants. Always seek advice from a medical professional before growing and/or consuming seeds and/or plants for medicinal purposes.

Herb/Plant Remedies
Angelica Colds, congestion, coughs, cramps, digestion, depression & hypertension
Anise Colds, congestions, cramps, digestion & IBS
Basil Memory & focus, headaches, inflammation, & stomach issues
Borage

Inflammation, Rhumatoid
arthritis 

Catnip Anxiety, colds, cramps, & insomnia
Chamomile Anxiety, cramps, digestion, ulcers, stress & insomnia
Dandelion Digestive issues, acne, & other skin problems
Hyssop Bronchitis, digestion issues, anxiety, colds & influenza
Lavender Acne, anxiety, depression, fibromyalgia, headaches, hypertension, insomnia & childbirth
  Lemon Balm Cardiovascular problems, colds, hypertension, childbirth, insomnia, & influenza
Lemon Grass Menstrual problems, nausea, & digestive issues 
Mint, Lemon Nausea & digestion issues
Mint, Spearmint Digestive issues, anxiety, & coughs
Rosemary Calms the nervous system, blocks histamines, helps regulate blood sugar, concentration & memory
Yarrow Colds, hypertension, menstrual issues, inflammation, & stomach ulcers


]]>
https://www.extensionsbychristy.com/blogs/news/how-to-deal-with-pests-in-the-garden 2022-02-02T13:55:37-08:00 2022-02-02T13:55:38-08:00 How to Deal with Pests in the Garden Christopher Surabian

As in so many areas of life, the best pest control in organic gardening is: Prevention.

As much as possible within the space of your garden, rotate (move) your crops around the garden so that no crop is planted in the same place for at least three years.

Not only should you keep the same plant from going in the same place, but keep other related plants out, too. This will help save your plants from both diseases and pests that build up in the soil around the roots of a particular kind of plant.

In addition, it’s good to grow as many different crops as you feel comfortable taking care of. Besides giving you some harvest even if one of your crops is completely destroyed by pests, this diversity is itself a form of pest control – pests move quickly through large plantings of the same crop, but more slowly through small plantings of diverse crops.

Most plants have few defenses when they are small, but as they grow older, their stems get thicker and less tasty for insects, and they develop the ability to release bitter or otherwise unpleasant substances in response to insect feeding. Their resistance to disease also increases.

If you have used the various preventative tactics mentioned above and you still have insect pest problems, there are some compounds that are used as organic pesticides. Keep in mind that these compounds are not like some of the conventional insecticides you might have used in the past – if they are o.k. for use in organic production, they are less toxic to your health, or at least break down more quickly in the environment than standard pesticides. Most of these compounds only kill insects when the insects are very small (larvae, or worm-like creatures, rather than adults). Also, most of these compounds are only effective for a day or two after you apply them, after which point they are destroyed by sunlight, rain, or just exposure to the air.

Use a molasses spray to keep bugs off your plants.

Organic molasses mixed with a few simple ingredients sprayed on plants, will help drive off harmful insects while giving your plants a boost. Insects like a very specific window of sugar content in plants. If you raise that, they will not want to eat it and if they do will die. Insects cannot bloat or release gas, therefore sugars create gas and it basically kills them from the inside out.

Though bugs hate it, plants love it.


Adding molasses to the soil in your garden helps to increase the microbial activity resulting in soil that holds moisture better and is also easier to plant in. When soil microbes are exposed to simple sugars, they multiply quickly. As microbes go through their living cycle, they add important nutrients to the soil, therefore, the more the merrier. You can also rid your yard of fire ants by spraying this over your grass too. This is the most inexpensive way to add sugars and ward off harmful insects to your garden and vegetable plants. 

Simple Molasses recipe for soil and plants: (spray bi-weekly directly onto the leaves)

  • 3 T. organic molasses
  • 1T. liquid organic garlic
  • 1T. liquid organic fertilizer
  • 1 gallon of water
]]>
https://www.extensionsbychristy.com/blogs/news/tomato-companion-planting 2022-01-28T10:41:30-08:00 2022-02-02T13:56:59-08:00 Tomato Companion Planting Guide Christopher Surabian


]]>
https://www.extensionsbychristy.com/blogs/news/how-to-plant-seeds-in-a-vertical-tower-garden 2022-01-28T10:09:38-08:00 2022-02-03T14:28:27-08:00 How to Plant a Vertical Tower Garden Christopher Surabian
🌱 See 80 Plants You Can Grow with Vertical Towers and Hydroponic Garden System

If you're short of growing space, or perhaps live in an apartment or condo...you may have wondered what sort of fruit or vegetables can be grown using a vertical grow system or tower garden.  There are many products on the market, each unique.  What can be grown successfully in these types of vertical growing systems are usually all the same however, regardless of what system you choose.

TOP -  
a great place to grow small-size plants
CENTER - a great place to grow medium-size plants
BOTTOM - a great place to grow large-size plants and/or vining plants

If they are large seeds like bean or squash seeds...1-2 seeds per cube will be fine.
If the seeds are smaller, feel free to use 3-5 seeds per cube.

Once your seeds have been planted in your growing medium, use this guide for placement on your Tower Garden

Using a tower garden, or vertical grow system allows you to grow food with no weeds, no soil, less disease and there is less headache when dealing with pests.  It's almost effortless compared to traditional gardening methods. They also use less water, which is great for the earth...and these systems can produce up to 30% or more in yield than growing in soil.  Despite what most people believe...YES, you can still practice organic gardening methods when growing hydroponically!   Read more---> "6 Reasons Why You May Want to Switch to Hydroponics"

Because a Tower Garden takes up less than 2 square feet of growing space, they are suitable for a wide variety of places. If you're a renter, you'll love the convenience of being able to move and take your garden with you.  Perfect for growing indoors as well, you can have fresh herbs and vegetables at your fingertips YEAR-ROUND, regardless of what grow zone or climate you live in. 


FOLLOW THIS GUIDE ON HOW TO GET STARTED:

Location /

If you want a successful garden, plan on placing your Tower Garden in a location that will receive 6-8 hours of light per day. Most plants will require this for a healthy production of fruit. If growing indoors, plan on supplying it with adequate artificial light and natural light whenever possible. Because most vertical grow systems are on wheels, you can even rotate your system if only one side of your Tower receives light through a window. 


Watering /

Because your system will be using a nutrient filled water solution, making sure you have a clean water source is important. To remove chlorine from tap water, place your water in a large container and leave it in the sun for about 48 hours. 


Placement of Plants in your Tower Garden /

Now that you've got your system set up and ready to go, placing your plants in the correct location on your Tower Garden is also an important step you don't want to miss. Keep in mind that you should limit the number of vining varieties you choose so that you can easily access all of your herbs, lettuces and veggies without getting lost in a jungle of vines. Also, when started your seeds in rock wool cubes or other medium take into consideration the size of the seeds when planting.

If they are large seeds like bean or squash seeds...1-2 seeds per cube will be fine.
If the seeds are smaller, feel free to use 3-5 seeds per cube.

Once your seeds have been planted in your growing medium, use this guide for placement on your Tower Garden:


]]>
https://www.extensionsbychristy.com/blogs/news/starting-seeds-during-winter 2021-12-23T14:28:54-08:00 2022-08-29T09:27:45-07:00 Seed Germination Tips & Tricks Christopher Surabian

January & February is when many gardeners begin to think about what they want to grow during the warmer month.  This is when most gardeners start ordering their seeds for spring & summer.

August & September is when many many gardeners begin to think about what they want to grow during the cooler months.  This is when most gardeners start ordering their seeds for fall & winter.

If you are interested in starting plants inside, use the Expanding seed starting soil pods will to make starting seeds much easier.

Here are some related links/blog posts that will help related to seed germination:

Getting Started: A Guide to Starting Seeds Indoors
https://www.extensionsbychristy.com/pages/getting-started-starting-seeds-indoors

How to Get Even Better Seed Germination
https://www.extensionsbychristy.com/blogs/news/how-to-get-better-germination-from-your-seeds

Tips for Successfully Starting Your Seeds Indoors
https://www.extensionsbychristy.com/blogs/news/16515489-tips-for-successfully-starting-your-seeds


]]>
https://www.extensionsbychristy.com/blogs/news/how-to-plant-grow-harvest-and-store-organic-garlic 2021-09-27T06:18:56-07:00 2021-09-27T06:18:56-07:00 How to Plant, Grow, Harvest, and Store Organic Garlic Christopher Surabian

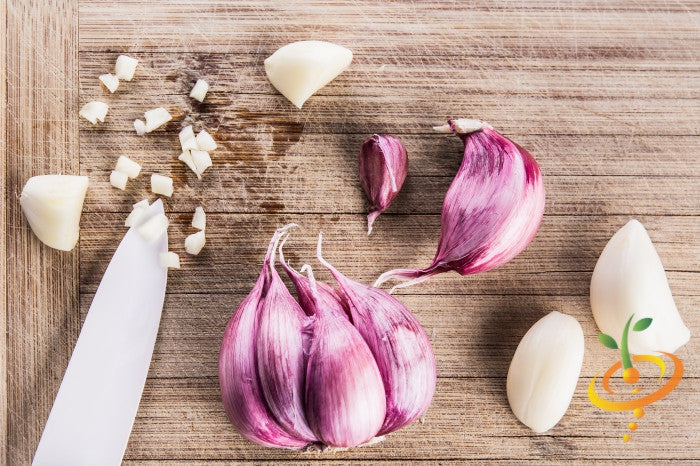
 Pictured: Silver Rose, Organic Garlic

How to Plant Garlic

Garlic can be planted in the spring as soon as the ground can be worked, but fall planting is recommended. Bulbs will grow bigger and more flavorful when you plant them in the fall.  Plant 6 to 8 weeks before your first hard frost.  In southern areas, February or March can be a better time to plant. Most people generally plant garlic somewhere between October-February.  

Click here to shop for Organic Garlic Cloves & Bulbs

Key Planting Info:

Break apart cloves from bulb but keep the papery husk on each individual clove.
Ensure soil is well-drained with plenty of organic matter. Plant in Full Sun.
Plant 4 inches apart & 2 inches deep, in their upright position (the wide end down and pointed end facing up).
Come springtime, shoots will begin to emerge.

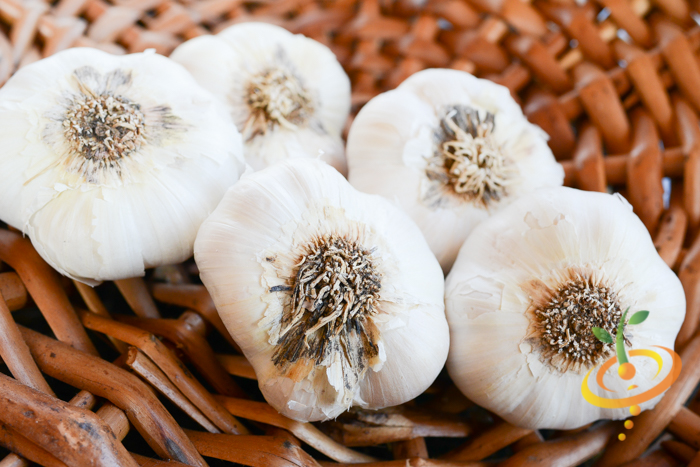
    Pictured: Elephant Organic Garlic

    How to Take Care of Garlic

    Northern states should mulch with straw for overwintering.  Remove mulch in the spring after the threat of frost is over. (Young shoots can't survive in temps below 20°F on their own. Keep them under cover.)

    Cut off any flowering shoots that come up in the springtime. They will decrease the size of the bulb.

    Fertilize with nitrogen, especially if you see yellowing leaves.

    Water once every 3-5 days during bulb-ing (mid-May through June).

    Pictured: Early Purple Italian, Organic Garlic

    When and How to Harvest

    You’ll know it’s time to harvest your garlic when the tops are yellow and they begin to fall over. Harvest the garlic before the tops are completely dry.

    Gently lift the bulbs with a spade or garden fork.  When you remove them from the soil, carefully brush off the soil and let them cure in an airy, shady spot for two weeks. Try hanging them upside down on a string.   The key to curing them is making sure that they have good air circulation.

    Pictured: Silver Rose, Organic Garlic

    How to Store Garlic

    Your garlic will be ready to store when the wrappers are dry and papery and the roots are also very dry. The head of the root should be hard and the cloves should come apart easily.

    Remote all dirt, roots & leaves. Keep the papery wrapper on—but remove any dirty parts. 

    Bulbs should be stored in a cool (40 degrees F), dark, dry place, for several months.

    The flavor of your garlic will increase as your bulbs are curing and drying.


    Remember! Make sure you save a few cloves of garlic from each head to plant again next year.

    ]]>
    https://www.extensionsbychristy.com/blogs/news/quick-to-mature-fall-winter-garden-crops-60-days-or-less 2021-09-06T06:52:47-07:00 2021-09-06T06:52:48-07:00 Quick-to-Mature Fall & Winter Garden Crops (60 days or less!) Christopher Surabian


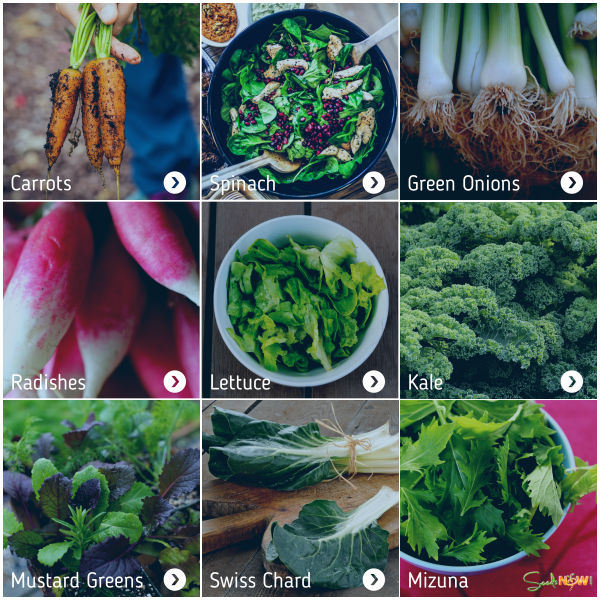
    #9 - Carrots are an annual cool-season crop, half-hardy to frost and light freezes.  They develop quite normally under a variety of temperature conditions, except very warm temperatures. It is often said that frost or cold weather will make them even sweeter. Shop all CARROT seeds! 

    #8 - Spinach can grow anywhere there is at least a month and a half of cool growing weather. Spinach is a cool-season crop, hardy to frosts and light freezes. In rows 12 inches apart, space seedlings 3 inches apart. Shop all SPINACH seeds! 

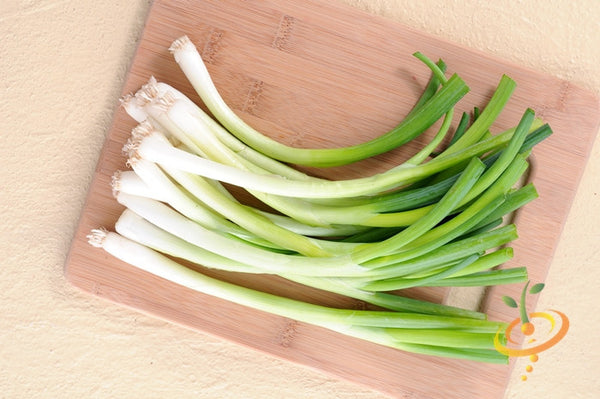
    #7 - Onions are easy to grow, have a fairly short growing period and take up little space in the garden. If you don’t have a vegetable garden, plant a few onions in your flower garden or in a pot or box and set them on your patio or in a sunny window. Plant onions 1/4 inch deep and 3 to 4 inches apart in double rows, leaving 6 to 10 inches between rows. If the onions are planted closer together, you can harvest every other plant as a green onion so that bulb development of the remaining plants is not impeded. Shop all GREEN ONION seeds!

    #6 - Radishes are a fast-growing, cool-season crop that can be harvested in as little as twenty days.  Eaten raw they can be whole, sliced, diced, or grated. You can also cook and pickle them. Most of them are typically eaten fresh and make a good addition to a salad or a substitute to pepper on a sandwich. Shop all RADISH seeds!

    #5 - Lettuce Seed should be sown thinly in rows 1 foot apart; for leaf types, thin plants to 2-3 inches apart, then thin again by pulling every other plant when half grown. This will encourage thickly developed plants. For head types, space rows 18 inches apart, plants 8-10 inches apart. Closer spacing results in smaller heads, which may be preferable for small families. Specialty growers are spacing lettuce very close for selling baby lettuces, a rapidly growing produce market. Shop all LETTUCE seeds!

    #4 - Kale can be planted pretty much anywhere in the United States where there's a cool fall growing season. It's a cool-season crop, hardy to frosts and light freezes. Shop all KALE seeds!

    #3 - Mustards are a quick and easy crop to grow in your home garden.  They are a spicy green, which will quickly become one of your favorite crops. When growing from seed, start them outdoors 3 weeks before the last frost. For a more steady harvest, plant seeds about every 3 weeks or every month to give you a successive harvest. Shop all MUSTARD seeds!

    #2 - Swiss Chard is a leafy green vegetable often used in Mediterranean cooking. Fresh young chard can be used raw in salads. Mature chard leaves and stalks are typically cooked (like in pizzoccheri) or sauteed; their bitterness fades with cooking, leaving a refined flavor which is more delicate than that of cooked spinach. Shop all CHARD seeds!

    #1 - Mizuna is a vigorous grower, which produces numerous stalks bearing dark green, deeply cut and fringed leaves. Shop MIZUNA seeds! 

    ]]>
    https://www.extensionsbychristy.com/blogs/news/which-seeds-can-i-plant-for-a-fall-and-winter-garden 2021-09-06T06:49:59-07:00 2021-09-06T06:53:33-07:00 Which Seeds Can I Plant for a Fall and Winter Garden? Christopher Surabian
    Having a thriving vegetable garden doesn't have to end when summer does. With a little bit of planning, and preparation you can grow vegetables well into the winter months or even year round if you live in a warmer climate down south.  
    Regardless of where you live, there are a few crops you can count on to withstand cooler temps, frost, and even sometimes snow.  

    Vegetables you can plant now will only become sweeter and more delicious if they go through a frost!

    When a frost comes into contact with a lot of these cool-season vegetables, they naturally react to the cold and produce extra sugars which can make some of the more bitter tasting vegetables taste rather sweet.

    Prepare NOW to have the garden you've always wanted during Fall/Winter! With these crops, put the fear of your plants being damaged or destroyed aside. When Winter weather rolls around, these vegetables will do well & actually THRIVE!

    Here is a list of 19 Frost Hardy Vegetables you should plant:


    1. Beets 

    Although beets grow well during warm weather, the seedlings are established more easily under cool, moist conditions.  Order Beet Seeds >


    2. Broccoli

    Broccoli plants thrive in cool temperatures, they have been known to survive temperatures as low as 28 F. Order Broccoli Seeds >


    3. Brussels Sprouts

    The plant will withstand frost and can be harvested until a hard freeze strikes. The best-quality sprouts are produced during sunny days with light frosts at night.  Order Brussel Sprouts Seeds >


    4. Cabbage

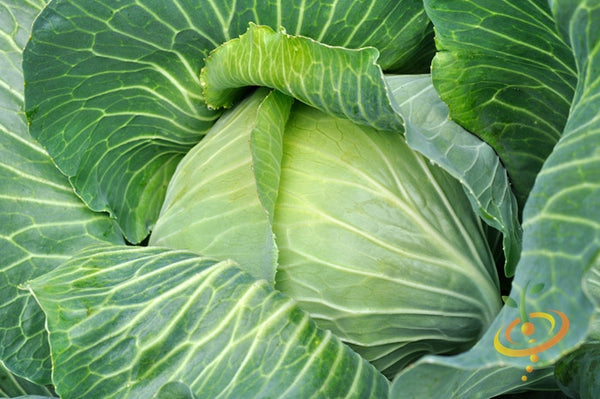
    Cabbage can withstand frost down to 20 degrees or even 15 degrees F. Order Cabbage Seeds >


    5. Carrots


    Carrots can survive temperatures as low as 15 degrees Fahrenheit, but prolonged periods of cold results in long, pale roots. Order Carrot Seeds >


    6. Cauliflower

     
    Cauliflower 
    can survive temperatures as low as 10 degrees Fahrenheit. Order Cauliflower Seeds >


    7. Celery

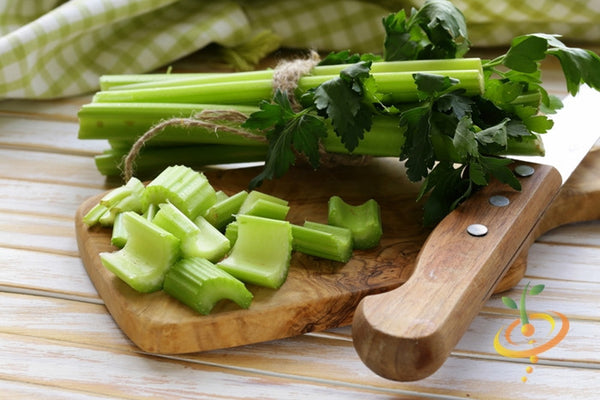
    Celery tolerates light frost only. Order Celery Seeds >


    8. Collards

    Collard greens are the most cold resistant of any plant in the cold-hardy Brassica family. Collards can withstand winter temps. down to 5 F. and they usually come through the cold even more flavorful.  Order Collard Seeds >


    9. Green Onions

    Onions are as hardy as they come. Frosts, freezing temperatures and snow will not kill them. Order Green Onion Seeds >


    10. Leafy Lettuces

    Frost damage on leafy vegetables doesn't render the plant inedible like a disease. You can harvest non-damage parts by cutting away brown areas and edges that are frost damaged and save just the leaf parts that are uninjured and your plant will continue to grow. Order Lettuce Seeds >


    11. Kale

    Snow can protect plants from extreme cold so that they stay in the garden longer. Kale is one of these plants! Very cold-hardy.  Order Kale Seeds >


    12. Leeks

    Leeks are very cold-tolerant, most likely to survive plunges to 0 °F.  Order Leek Seeds >


    13. Mustard


    When spent days under the cover of snow they have been known to emerge in perfect condition once the snow melts. Order Mustard Seeds >


    14. Parsnips


    Parsnips are generally tolerant to 0 °F and will sweeten in flavor if hit with a light frost or two. Order Parsnip Seeds >


    15. Radishes


    Radishes thrive in the cooler weather when frost can be a threat to other crops.  They can survive hard freezes as well. Order Radish Seeds>


    16. Rutabagas


    When exposed to light frost, rutabagas can actually taste sweeter. To extend the harvest season & protect the crops from heavier frosts, just add a thick layer of straw. Order Rutabaga Seeds >


    17. Spinach


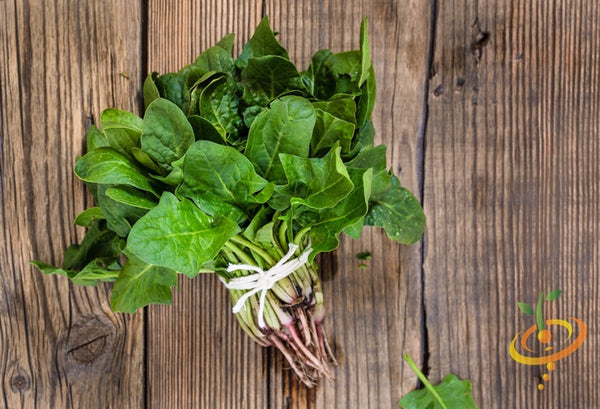
    Grows slowly through the winter but will always bounce back in early spring. Order Spinach Seeds >


    18. Swiss Chard


    Swiss chard is very cold-tolerant, & can survive dips to 15 °F without any protection. Order Swiss chard Seeds >


    19. Turnips

    Turnips lose much of their spiciness and accumulate sugar when they mature in cold weather. Order Turnip Seeds >


    ]]>
    https://www.extensionsbychristy.com/blogs/news/what-is-a-cover-crop 2021-09-06T06:46:32-07:00 2021-09-06T06:46:33-07:00 What is a Cover Crop? Christopher Surabian

    Cover crops should be planted around late September or early October so they have a chance to get established before the weather becomes very cold.

    The use of cover crops is growing in popularity with home gardeners, especially rye grass, hairy vetch, or these other varieties. If planted thickly, cover crops provide many of the benefits of mulch. Hairy vetch is a legume (it takes nitrogen out of the air and makes it available for plant growth), and it enriches the soil in a way that mulch does not. 

    Here are the most popular cover crops available:

    Buckwheat:

    Especially valuable for its release of phosphorus, buckwheat also contributes a significant amount of organic matter. Very competitive with weeds, good for breaking up the soil. Can grow two crops in the north.

    Bees love Buckwheat!  Good bugs love buckwheat!
    Seed when ground is well warmed and after last spring frost; it has no frost tolerance. When June planted, in 35 days it is waist high, in bloom and ready to plow under. Good to follow with a fall crops of rye and Austrian winter pea. Just rake in some seed after harvesting an annual crop and buckwheat will keep out the weeds and look great doing it. Green Lacewing adults will feast on the nectar then deposit their "aphid lion" eggs on nearby garden crops.

    Order Buckwheat Seeds Now > 


    Fall & Winter Rye: 

    Very hardy, valued for its ability to break up hard pan soils with a profusion of roots and root hairs. Suppresses weeds, adaptable to a wide range of soil and climate conditions. Can plant from early spring until the ground freezes as a winter cover crop. Plant in fall with winter peas for nitrogen, organic matter and weed suppression. Planting rate: 3lbs per 1,000 sq ft. 

    Order Fall & Winter Rye Seeds Now >


    Yellow Clover: 

    Tremendous green manure and bee pasture. Vigorous grower with long tap roots to help break up compact soil. Can produce up to 125 lb. of nitrogen per acre. Sow in the spring or summer. Planting rate: 1/2 lb per 1,000 sq ft.

    Order Yellow Clover Seeds Now >


    Crimson Clover:

    Planted spring, summer or fall, this quick growing clover is the most versatile variety for a green manure to enrich soil. Needs good moisture. Flowers are used for tea. Excellent forage and cover crop. Planting rate: ½ lb. per 1,000 sq. ft.

    Order Crimson Clover Seeds Now >


    White Dutch Clover: 

    Perennial. A low-growing perennial clover that forms a nice mat perfect for pathways between beds. It competes well against quckgrass and, although the plants grow over into the beds, they can easily be pulled back with a rake before mowing. As a green manure/cover crop, it fixes nitrogen and since it's perennial, can be plowed in at any time. Pre-inoculated seed. Plant in early spring: April-May. Planting rate: ½ lb per 1,000 sq. ft.; 8-10 lbs per acre for dry land, 10-12 lbs per acre for irrigated land.

    Order White Dutch Clover Seeds Now >


    Hairy Vetch: 

    Valuable soil-improvement crop. Vigorous legume produces huge amounts of nitrogen-rich biomass for turning under. Can be planted in the spring through late summer. Late summer (late August early September) planted vetch will winter over, growing vigorously the following spring. Can be mixed with oats or rye for maximum weed competition. Hardy; will also sprout in the spring if planted before the ground freezes in November (like winter rye). Demands fairly fertile soil and adequate rainfall as is shallow-rooted. Livestock caution: Seeds are poisonous. Planting rate: 1 lb per 1,000 sq ft.

    Order Hairy Vetch Seeds Now >


    As the weather becomes consistently cold, you can work at preparing your garden for winter. There are several aspects to winter garden preparation you should pay attention to.  

    1. cleaning and putting away tools,
    2. use of mulch and/or planting of cover crops, and
    3. planting of certain crops that will survive the winter and grow early in the spring (view a list of cold hardy plants).

    Putting away hoses, sprinklers, and other tools should take relatively little time. Hoses and sprinklers always have some water in them, and when it freezes and expands, it can damage these tools. For this reason, hoses and sprinklers should ideally go in a place where they will not freeze. If this is not possible, put them in any sheltered place.

    Now is also a good time to clean the soil off tools like spades, hoes, and rakes and put them in any sheltered place – cold alone won’t hurt these tools, but exposure to wind, rain, and snow will damage the handles and loosen the heads.

    Dry off any floating row covers you may have used, fold them up, and put them away in a sheltered place. Gather up any wooden stakes and other wooden structures you have built and stack them under shelter to reduce rotting. Tomato cages and metal stakes should be pulled out of the soil but left outside – the exposure to the elements will help kill any disease-causing organisms that may be on them.


    Whether you choose to mulch or plant a cover crop throughout your garden after your vegetables are gone is up to you (as a third option, many gardeners choose to do nothing at all, but just leave the garden exposed over the winter). A cover crop is a crop planted primarily to manage soil erosion, soil fertility, soil quality, water, weeds, pests, diseases, biodiversity and wildlife in an agroecosystem.

    Cover crops are of interest in sustainable agriculture as many of them improve the sustainability of agroecosystem attributes and may also indirectly improve qualities of neighboring natural ecosystems.  
    Use of mulch is recommended – you could cover your whole garden with as much as 15 cm (6 in) of mulch in the form of newspaper, straw, or leaves, possibly putting compost, manure, or another soil amendment underneath the mulch.

    ]]>
    https://www.extensionsbychristy.com/blogs/news/a-complete-guide-to-growing-the-best-potatoes-in-your-garden-www-seedsnow-com 2021-03-27T22:01:07-07:00 2021-08-30T20:52:49-07:00 A Complete Guide to Growing the Best Potatoes in Your Garden 🥔 www.extensionsbychristy Christopher Surabian

    Preparing your seed potatoes: 

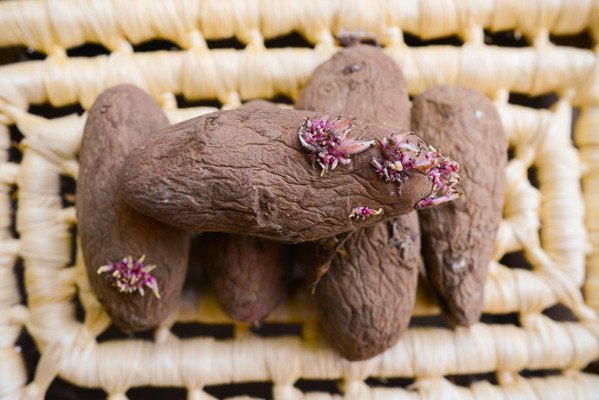
    When your potatoes arrive, make sure if they have already begun to sprout that you leaves these sprouts on.  Breaking them off can delay growth and even limit the amount of vines that eventually will emerge from your seed potato. Seed potatoes that are roughly the size of an egg may be planted whole, but if they are larger make sure to cut them into smaller pieces, each one with a strong eye if possible.

    Where to plant your seed potatoes:

    When choosing a location try to find soil that is deep, loose and well-drained. Most of the varieties we carry will have aggressive root systems which will benefit from moisture retentive soil as well. Even if your soil is less than ideal, keep in mind that potatoes are quite adaptable and will produce decently even in less than quality soil.  Aim for a pH ranging from 5.2-6.8. When fertilizing don't give your potatoes too much nitrogen. If you do, they'll grow plenty of leafy vines but won’t produce very many tubers.

    When and how to plant your seed potatoes:

    For optimum growth, the soil temperature should range from 55 deg. F. to 70 deg. F. The width between rows and overall plant spacing is determined by the size of your garden, however, gardeners can get by with as little as 2 feet between rows. Dig a shallow trench about 6-8 inches deep and plant the seed pieces 10-14 inches apart in this trench. Using a rake, cover the seed with 3-4 inches of soil. Do not fill the trench completely. 

    Use "hilling" techniques while your potatoes are growing:

    When the stems are about 8 inches high, gently hill the vines up with soil scraped from both sides of the row with a hoe. Leave about half of the vine exposed. Hilling puts the root system deeper where the soil is cooler while the just scraped-up soil creates a light fluffy medium for the tubers to develop into. All tubers will form between the seed piece and the surface of the soil. Another hilling will be needed in another 2-3 weeks and yet another as well, 2 weeks after the second. On subsequent hilling, add only an inch or two of soil to the hill, but make sure there is enough soil atop the forming potatoes that they don't push out of the hill and get exposed to light.

    Harvesting your Potatoes:

    Try to wait for the tops of your plants to die back naturally, so your harvest will be a little bigger and your potatoes just a tad richer. Dry soil is definitely preferred when harvesting; the tubers come up a lot cleaner and with much less effort. Once the tops are dead, rest the tubers in the ground, undisturbed for two weeks to "cure," while the skins toughen up, protecting the tubers from scuffing and bruising during harvest and storage. It is better to harvest in the cool morning hours.

    Shop all Organic Seed Potatoes!

    To learn more, visit:

    "How to Plant, Grow, and Harvest
    Organic Potatoes from Seed"

    ]]>
    https://www.extensionsbychristy.com/blogs/news/how-to-save-your-tomato-seeds 2020-11-05T06:37:04-08:00 2021-08-30T20:52:50-07:00 How to Save Your Tomato Seeds Christopher Surabian Saving tomato seeds is a popular tradition amongst most gardeners. They take their most prolific plants, and favorite varieties and pay special attention to harvesting seed for the following year. There are several ways that you can save your heirloom tomato seeds, but here are two of the most popular techniques.  

    More

    ]]>
    There are several ways that you can save your heirloom tomato seeds, but here are two of the most popular techniques. 

    Fermentation Method:

    1. Choose a beautiful, healthy fruit that is slightly over-ripe.
    2. Slice open.
    3. Gently squeeze seeds into a cup.
    4. Add a small amount of water, just enough to cover the seeds.
    5. Cover the cup with a kitchen towel and make sure they don’t dry out. Let ferment for 3-7 days. (Mold will begin to grow, this is normal and expected.)
    6. Rinse well, and allow to fully dry on a paper towel.
    7. Store in a cool, dry place such as an airtight bag or seed vault.

    Non-Fermentation Method:

    1. Choose a beautiful, healthy fruit that is slightly over-ripe.
    2. Slice open.
    3. Gently squeeze seeds onto a paper towel.
    4. Let fully dry for about 1 week.
    5. Store in a cool, dry place such as an airtight bag or seed vault.

    Saving tomato seeds is a popular tradition amongst most gardeners. They take their most prolific plants, and favorite varieties and pay special attention to harvesting seed for the following year.

    Hybrid VS. Heirloom + Why it matters?

    Hybrid plants are a combination of two different sets of genetic material. If a hybrid tries to mate with another plant, even another plant of the same hybrid type, it may not be able to produce any fruit at all and will usually fail to show the desired characteristics of the mother plants. For example, if a large-fruited, disease-resistant tomato plant were allowed to mate with another similar plant, the offspring might have small fruits and lack disease resistance – the benefits of creating the hybrid, to begin with, would have disappeared in producing the next generation.

    Heirloom varieties have been passed down from generation to generation and have stabilized over time. They will produce fruit true-to-type, like that of that plant it came from. Repeat variety and quality can be expected as long as you avoid any cross-pollination. Learn more about Hybrid vs. Heirloom


      ]]>
      https://www.extensionsbychristy.com/blogs/news/best-time-to-plant-wheel 2020-07-28T13:08:00-07:00 2021-08-30T20:52:52-07:00 PLANTING CALENDAR - Know when it's the best time to plant! Alex Alex Growing food at home is one of the most rewarding things you can do for yourself and your family right now. Maybe you feel like the current growing season has passed you by, and you will need to wait until next spring to start? or maybe you want to try something new this coming fall or winter?

      Regardless of why you found yourself reading this article, we’re going to point out some great tips for growing your favorite fruits, vegetables, and herbs.  We're here to help you become successful at year-round gardening

      +click to enlarge image

      All vegetables need either a cool growing season, or a warm growing season to be healthy and prolific. Learning your correct grow zone/location is crucial to having a bountiful harvest. You may even want to contact your local Extension Office for exact planting dates and schedules.

      The graphic above shows you:

      *These exact dates will obviously vary based on your location but this should help get you started!


      SPRING  March 1st – May 31st

      SHOP SEEDS FOR SPRING

      WHAT TO PLANT NOW: In early spring, focus on sowing crops like: radish, carrots, turnips, peas, lettuce, spinach, kohlrabi, broccoli, cabbage, leeks, collards, onions, Brussels sprouts, asparagus, cauliflower, and herbs such as parsley, cilantro and dill.

      As the season progresses, you’ll be ready to start your summer crops such as: tomatoes, peppers, eggplant, melons, cucumbers, squash, strawberries & more!

      MORE THINGS TO DO: In early spring, you will want to start your seeds indoors and begin prepping your garden beds. Get a new garden hose or invest in a self-watering irrigation system. Learn how you can water more efficiently as things start to heat up and dry out. Sharpen and clean all of your garden tools to make sure they’re ready when you are.

      As soon as the ground can be worked you should begin to:

      1. Amend your soil
      2. Remove any weeds
      3. Compost


      SUMMER June 1st – August 31st

      SHOP SEEDS FOR SUMMER

      WHAT TO PLANT NOW: Continue planting your summer favorites such as tomatoes, peppers, eggplantsquash, melons, potatoes, onions, herbs, and maybe a few more root crops and leafy greens before it gets too hot for them. If you’re into fresh herbs, summer is the perfect time for growing basil, mint, lemongrass and chives.

      MORE THINGS TO DO: Now is the time to get outside and “button-up” any gardening chores before the summer heat makes even the simplest jobs seem unbearable. Make sure you water your plants deep and regularly to ensure they aren’t drying up during the much longer, warmer days. As temperatures rise, so does your flexibility in terms of planting. No longer are you running the risk of an unexpected freeze damaging your newly planted seedlings, and your heat-loving crops will actually begin to thrive! 

      MORE TIPS AND TRICKS:

      Plant these seeds in July/August – View

      Herbs & Veggies to Plant NOW for a Summer Garden – View

      Heat Loving Veggies & Herbs You Can Grow RIGHT NOW in Summer! – View

      12 Plants That You Can Grow This Summer To DETER Mosquitoes – View

      Have a Better Summer Garden With These 7 Tips! – View


      FALL  September 1st – November 30th

      SHOP SEEDS FOR FALL

      WHAT TO PLANT NOW:

      Most gardeners will agree, the crop they look forward to planting the most during fall is garlic! Drop your favorite soft or hardneck varieties as long as the soil remains workable (for most this falls somewhere between September/October). If you get them into the ground early enough, potatoes will do well until your first freeze arrives.

      Fall is also the best time for planting blueberry bushes. Start planting your fall root vegetables such as carrots, radishes, beets, turnips and parsnips. Love salads? Your favorite greens will thrive in the cooler temperatures of fall.

      September - October is prime time for sowing your favorite cover crop varieties! “A cover crop slows the velocity of runoff from rainfall and snowmelt, reducing soil loss due to sheet and rill erosion. Over time, a cover crop regimen will increase soil organic matter, leading to improvements in soil structure, stability, and increased moisture and nutrient holding capacity for plant growth.” source: nrcs.usda.gov

      MORE THINGS TO DO:

      As summer winds down, be sure to replenish the nutrients in your garden beds by adding fresh compost or manure. We hope you’ve collected seed from your previous harvests by allowing them to “go to seed” and then harvesting them for future growing seasons. Learn about Seed Saving tips and tricks.  Clean out any cold-frames you may have or the greenhouse in preparation for winter months ahead. Cut back any dead or dying perennials and clean/sterilize your garden tools. Take cuttings from your favorite herbs before they are destroyed by frost. Continue to enjoy them throughout fall and winter by growing an indoor container garden or grow them in the windowsill.

      MORE TIPS AND TRICKS:

      How to Plant a Fall Garden. Step-by-Step – View

      Fall and Winter Gardening Made Easy – View

      16 Crops To Plant NOW for Fall! – View

      Our TOP 10 Favorite Fall & Winter Gardening YouTube Videos! – View

      Quickest Crops to Mature for a Fall & Winter Harvest – View


      WINTER  December 1st – February 28th 

      SHOP SEEDS FOR WINTER

      WHAT TO PLANT NOW:

      A great time to be starting your favorite summer crops INDOORS. You should be starting tomatoes, peppers, eggplant  & more towards the end of Winter.  

      Grow sprouts & micro greens!  Most of your favorite spring and summer vegetables do well in the form of sprouts, so get your “nutrient fix” by starting a tray of them in the windowsill of a south facing window. Love to cook? Herbs can be planted in small pots or containers indoors if you supply them with enough light.

      Do you still have some crops left out in the garden from fall? Some would say that beets, parsnips, carrots, Brussels sprouts, kale, turnips and rutabagas all taste sweeter after a frost!  So don’t be in such a hurry to pull these from your vegetable beds.  Let winter come, then enjoy!

      MORE THINGS TO DO:

      For most gardeners, winter becomes a season of rest. A lot of us enjoy taking a few months off, regrouping from the long hauls of summer and fall, but if you’re still craving fresh food from your garden, we have great news! You STILL have options!

      Southern states and warmer regions can grow most of their favorite fruits, veggies and herbs all the way through winter, without hesitation.

      MORE TIPS AND TRICKS:

      How to Store Vegetables for Winter – View

      10 Vegetables You Can Over-Winterize – View

      It’s Winter!  What to do in the garden now?! – View

      Most Popular Seeds to Plant Now for Fall/Winter Gardening – View


      ]]>
      https://www.extensionsbychristy.com/blogs/news/most-popular-blog-posts 2020-06-28T11:37:00-07:00 2022-01-08T06:07:13-08:00 Gardening Tips & Tricks ⭐⭐⭐⭐⭐ Alex Alex SPRING & SUMMER GARDENING TIPS & TRICKS:

      Herbs & Veggies to Plant NOW for a Summer Garden - View

      Heat Loving Veggies & Herbs You Can Grow RIGHT NOW in Summer! - View

      12 Plants That You Can Grow This Summer To DETER Mosquitoes - View

      Have a Better Summer Garden With These 7 Tips! - View

      Spring Gardening Checklist - View


      FALL & WINTER GARDENING TIPS & TRICKS:

      5 Vegetables You Can Grow In Containers During the Fall & Winter Months - View

      How to Plant a Fall Garden. Step-by-Step - View

      Plant these seeds in July/August - View

      How to Store Vegetables for Winter - View

      10 Vegetables You Can Over-Winterize - View

      19 Frost Hardy Vegetables to Plant this Fall - View

      Fall and Winter Gardening Made Easy - View

      16 Crops To Plant NOW for Fall! - View

      15 Vegetables You Should Be Planting NOW for a Fall Harvest - View

      Tips for Starting Your First Fall Garden & 19 Crops That Can Withstand Freezing (or almost freezing) Temperatures! - View

      Our TOP 10 Favorite Fall & Winter Gardening YouTube Videos! - View

      19 Crops You Should Try Growing This Fall or Winter - View

      TOP 9 QUICK GROWING CROPS FOR FALL & WINTER - View

      It's Winter!  What to do in the garden now?! - View

      Most Popular Seeds to Plant Now for Fall/Winter Gardening - View


      SEED STARTING TIPS & TRICKS:

      6 Tips That Every NEW Gardener Should Know  - View

      Tips for Successfully Starting Your Seeds Indoors - View

      Egg Carton Seed Trays - View

      Use Muffin Tins To Start Your Seeds In! - View

      How do I Know Which Seeds to Direct Sow and Which to Seeds to Start Indoors? - View

      How to Get Better Germination From Your Seeds - View

      9 Steps to Harden Off Seedlings - View

      7 Tips For Using Rockwool To Start Your Seeds - View

      Are you starting enough seeds? - View

      What's the proper way to thin seedlings? 🌱 🌱 - View

      Seed Planting & Spacing Cheat Sheet - View

      WAIT!  Don't start these seeds indoors yet! - View

      OK!  It's time to start these seeds indoors NOW! - View


      RAISED BED GARDENING TIPS & TRICKS:

      Tips on Building Perfect Raised Beds! - View

      Great Materials For Making Raised Beds! - View


      CONTAINER GARDENING TIPS & TRICKS:

      5 Simple TIPS to Growing Herbs in Containers - View

      6 Tips for Gardening in Containers - View

      9 of The Best Vegetables to Grow in Small Gardens  - View

      5 Fantastic Tips for Watering Your Container Garden - View

      Small Space Gardening Ideas For Your Boat or RV - View


      RANDOM POSTS:

      Why You Should Join a Community Garden - View

      Inspirational Gardening Quotes! - View

      How To Make A Bean Teepee - View

      How to Build a Vine Tee-Pee - View

      How To Grow & Care For Your Strawberry Plants - View

      How to Grow Perfect Parsnips - View

      How Do You Cure Potatoes? - View

      How To Tell When An Eggplant Is Ripe - View

      Everything You Ever Wanted To Know About Squash Blossoms - View

      4 Easy Steps to Dry & Cure the Small Ornamental Gourds You Grew! - View

      8 Gardening Hacks You Need to Know - View

      Tips for Growing More Food Indoors, All-Year-Long! - View

      Everything you need to know about gardening through all the seasons - View

      14 Green Fruits and Vegetables You Should Be Eating - View

      How to Use a Mason Jar as a Cloche - View 

      Are You a First Time Gardener? Start Here! - View

      5 Season Extension Techniques for Year-Round Gardening - View

      32 Edible Perennials (or plants that can ACT like Perennials!) - View

      How to Grow Your Own Salsa Garden - View

      How To Make a Pizza Garden - View

      How To Successfully Plant a Straw/Hay Bale Garden - View

      The Secret to Building a Salad Keyhole Garden - View


      SPROUTING & MICRO-GREEN TIPS & TRICKS:

      How to Grow Sprouts at Home *Without Soil*  - View

      How to Sprout Wheat Berries at Home in a Mason Jar - View

      How to Grow Sprouts Easily at Home Using a Mason Jar-View

      Micro-greens! The Benefits are anything but MICRO! - View


      ANIMAL & PET GARDEN TIPS & TRICKS:

      What to Plant for a Pet Friendly Garden - View

      Which Plants Do Bunnies, Cats, Dogs, and Chickens Like to Eat? - View

      How To Supplement Your Animal Feed by Growing Fodder at Home - View


      WATER TIPS & TRICKS:

      Ways To Conserve Water in Your Vegetable Garden - View

      8 Tips on How to Water More Efficiently - View


      COMPOST, MULCH,  & SOIL AMENDMENTS

      Composting DO's and DON'Ts - View

      18 Things You Should Never Compost - View

      Your Vegetables Like Coffee, Just As Much As You Do! -   View

      How to Use Coffee Grounds In Your Garden - View

      How to Use Eggshells in Your Garden - View

      How To Use Seaweed In Your Garden  - View


      CANNING & PICKLING // RECIPES // DIY

      Everything You Need To Start Canning Your Homegrown Vegetables! - View

      How Do I Can My Homegrown Vegetables? View

      Best Crops to Grow For the Home Canner - View 

      How to Grow & Pickle Homegrown Peas - View

      Create Easy Pickled Radishes in Less Than 5 Minutes - View

      Which Vegetables are Best to Ferment? - View


      OTHER RECIPES

      This is how you make the best hummus dip! DIY Recipe - View

      How To Make Amazing Zucchini Chips - View

      How to Make a Stuffed Zucchini Crocodile - View

      7 Awesome Mint Drink Recipes - View

      How to Roast Garlic in the Oven - View


      DIY PROJECTS

      How To Make Your Own Seed Tape - View 

      Make Ahead "Salad in a Jar”- View

      Make a Tic Tac Toe Game For Your Garden - View

      How to Make Watermelon Candy - View

      [DIY] Honey-Lavender Luffa Gourd Soap - View


      PESTS  & PROBLEMS // GARDEN CONTROL

      Common Gardening Problems & How to Cure Them - View

      How To Attract Beneficial Ladybugs Into Your Garden - View

      Common Problems In the Garden and How To Fix Them! - View

      3 Ways to Kill Weeds Naturally & Quickly - View

      Learn How to Recognize and Prevent Mosaic Virus in Your Garden - View

      4 Trap Plants You Should Be Growing To Help Deter Pests - View

      8 Ways To Get Rid of Garden Pests (Without Any Chemicals!) - View

      Natural Pest Control Methods - View

      HELP!  My Plants are Tall, Thin, and Leggy.  What should I do? - View

      How to Control Powdery Mildew, the Easy Way! - View

      Plant THESE To Attract More BEES! - View

      15 Plants That Repel Mosquitoes - View

      Plants That Naturally Repel Mosquitoes - View

      Use Beer To Kill Slugs - View

      BEER = An Effective Method for Slug Control [Who Knew!?] - View

      Why Won't My Root Veggies Grow? - View

      How do You Use Epsom Salts to Fertilize Your Plants? - View


      FLOWERS // HERBS // POLLINATORS:

      Treat Your Ailments Naturally With Homegrown Herbs -  View

      15 Herbs You Can Grow at Home To Make Your Own Tea - View

      10 MUST GROW Plants for Herbal Tea Lovers - View

      How to Grow an Indoor Herb Garden - View

      Top 4 Air Purifying Herbs You Can Grow Indoors - View

      11 Easy To Grow Medicinal Herbs - View

      Healing Herbs That Anyone Can Grow at Home - View

      Top 6 Culinary Herbs You Never Knew You Could Grow Indoors, During Winter! - View

      27 Plants That Produce Edible Flowers - View

      38 Edible Flowers To Plant In Your Garden - View

      PRO Tips for Growing Wildflowers Successfully - View

      How to Grow Beautiful and Healthy Sunflowers - View

      Save the Bees! Plant a "Bee-Friendly" Garden Today! - View


      LETTUCE,  SALAD, & LEAFY GREENS:

      7 Tips and Tricks for {Fresh} Lettuce {Longer} - View

      How to Grow a "Cut and Come Again" Salad Bar Garden - View

      Make Ahead "Salad in a Jar”- View

      The Secret to Building a Salad Keyhole Garden - View


      PEPPERS:

      How Hot Will My Peppers Be? Scoville Scale Heat-Ranking for Hot Peppers! - View

      Tips on How To Successfully Germinate Hot Pepper Seeds -View

      15 Super HOT Varieties Every Pepper Enthusiast Must Try! - View

      Tips for Germinating HOT & SWEET Pepper Seeds - View


      TOMATOES:

      4 Ways to Ripen Green Tomatoes - View

      Tips for Controlling Tomato Hornworms - View

      How to Plant Tomatoes the Right Way - View

      How to Make Pickled Tomatoes, In Just 5 Minutes - View

      Spank Your Tomatoes! -Get More Fruit on Every Plant- - View

      14 Companion Plants to Grow With Your Tomatoes! - View


      GREENHOUSE:

      Tips for Growing Better in a Greenhouse - View


      HOOPHOUSE:

      How to Build a "Hoop House" for your Fall and Winter Gardening! - View


      HYDROPONICS & TOWER GARDEN:

      15 Lettuce & Leafy Greens You Should Try Growing Hydroponically - View

      80 Plants You Can Grow with Vertical Towers and Hydroponic Garden System! - View

      How to Plant a Vertical Tower Garden - View

      These are the most popular ways to grow food, Vertically! - View

      Aquaponics: Why It Works! - View

      Make A Vertical Planter with Terracotta Pots - View


      SHADE:

      How to Grow Vegetables and Herbs in Partial Shade - View

      Which Vegetables & Herbs Grow Best in Light - Partial Shady Gardens?  - View


      HEAT & DROUGHT:

      Heat-Loving Varieties that Grow Great in the Southern States - View

      33 Drought Tolerant Crops For Dry or Hot Climates - View


      ]]>
      https://www.extensionsbychristy.com/blogs/news/giant-pumpkin-seeds 2020-06-24T10:59:00-07:00 2021-09-27T06:20:48-07:00 How to Grow a GIANT Pumpkin! Alex Alex If you’re planning on growing a GIANT pumpkin, keep in mind that you may need anywhere from 400 sq. ft. all the way up to 1200 sq. feet for just ONE pumpkin!  Towards maturity your pumpkin can grow up to 40 lbs in just ONE day.  And what about water?  Well, the larger the pumpkin gets, the more water it's going to need, right?!  It’s not uncommon for competition-sized pumpkins to use up to 500 gallons of water in just ONE week!!  Pretty amazing.  Have fun watching these gigantic pumpkins grow in your backyard.  It's fun for the whole family and community. 

      Do you want to grow the biggest pumpkin you've ever seen? Are you interested in making this a new hobby or perhaps you’re wanting to take it to the “next level” and start entering competitions? Either way, we’ve gathered some of the best tips and tricks to help you start growing HUGE, competition-size pumpkins right in your own backyard!

      Click here to order giant pumpkin seeds now

      First, you want to make sure you’re starting with the correct type of pumpkin. Sure, you can always bend genetics, slightly, but you’ll have better success if you choose an heirloom pumpkin that organically grows larger than most varieties. We highly recommend if you’re just getting started to try the BIG MAX or ATLANTIC GIANT variety.


      Once you have chosen your variety of pumpkin, you’ll need ideal growing conditions.  Let’s start off with the basics:

      TEMPERATURE:

      • In order to germinate properly, pumpkin seeds generally need temperatures between 65 and 75 degrees F.

      • Ideal soil temperatures should fall into the 70-90 degrees F. range.

      SUN LIGHT: 

      • Pumpkins need A LOT of sunlight to grow and develop.

      • Pick a location with FULL SUN and stay away from anything that gets partial shade.

      SOIL QUALITY:

      • Not only is the type of pumpkin you choose to grow, and the location important, but let’s not skip over one of the MOST important factors to growing a successfully LARGE pumpkin…the soil! Read: Introduction to Soil

      • Your pumpkins will do best if you choose a location that has either a slightly acidic or neutral soil.

      • Make sure the ground is loose and drains well. Loam soil is best.

      SPACING:

      • If you’re planning on growing a LARGE pumpkin, keep in mind that you’ll need up to 1200 sq. feet for just ONE pumpkin!

      • Spacing is everything, so don’t crowd them together.

      • The larger you want to grow, the further apart the spacing should be.

      WATERING

      • The larger the pumpkin gets, the more water it will need! It’s not uncommon for competition-sized pumpkins to use up to 500 gallons of water per week!

      • After watering, the ground should be evenly moist, but never soggy. Like many fruits, try to keep the water off the foliage of the plants. This will discourage disease.

      FEEDING & FERTILIZING:

      • Early in spring, you’ll want to add something like aged manure or compost into your soil.

      • In the fall, lime can help bring the soil back to neutral if it’s more on the acidic side. During your growing season, apply aged compost or manure to fertilize.

      • Fertilize with fish emulsion early on, and then as the pumpkin starts to develop, switch to phosphorus or bone meal.

      • Near the end of the growing season move onto potassium or greensand.

      GROWING & HARVESTING:

      • Pinch off all flowers in the beginning to encourage growth. Until your plant reaches about 10 feet long, there should be no flowers left on the plant. Pinch. Pinch. Pinch.

      • Once your vine is 10 feet long, allow it to start setting fruit. Remove ALL but the largest pumpkins for the next few weeks.

      • Try placing your “strongest/largest” pumpkin on a piece of cardboard to help repel any insects that live in the soil.

      • Stake down any large vines or bury them to help keep them from rolling.

      • Keep the area you’re growing in “weed-free” so your pumpkin plant won’t have to compete for nutrients in the soil.

      • As the pumpkin matures, keep it shaded to help prevent it from overheating or being scalded by the sun. This also will help prevent splitting or cracking.

      • Harvest your pumpkin JUST BEFORE your first frost.

      • If you’re planning on entering any competitions be careful to harvest before any cracks appear as this might disqualify you and your pumpkin.


      ]]>
      https://www.extensionsbychristy.com/blogs/news/plant-these-seeds-in-july-august 2020-06-18T18:51:00-07:00 2023-04-01T06:23:45-07:00 Plant these seeds in July & August! Alex Alex
      Summer has just begun but will soon be over!  Regardless of where you live, there are a few crops you can count on to withstand cooler temps, frost, and even sometimes snow.  

      Having a thriving vegetable garden doesn't have to end when summer does. With a little bit of planning, and preparation you can grow vegetables well into the winter months or even year round if you live in a warmer climate down south.  


      Vegetables you can plant now will only become sweeter and more delicious if they go through a frost!

      When a frost comes into contact with a lot of these cool-season vegetables, they naturally react to the cold and produce extra sugars which can make some of the more bitter tasting vegetables taste rather sweet. 

      Prepare NOW to have the garden you've always wanted during Fall/Winter! With these crops, put the fear of your plants being damaged or destroyed aside. When Winter weather rolls around, these vegetables will grow well & actually THRIVE!
       
      Here are just a few of our most popular articles and blog posts regarding Fall and Winter gardening:
      Plant these seeds in July/August - View

      Planning a Fall/Winter Garden ... Step-by-Step - View
       
      Tips for Starting Your First Fall Garden - View

      Most Popular Seeds to Plant for Fall/Winter Gardening - View
       
      5 Fall Vegetables Worth Growing In Containers This Year - View
       
      19 Frost Hardy Vegetables to Plant this Fall - View
       
      Fall and Winter Gardening Made Easy - View
       
      Our TOP 10 Favorite Fall & Winter Gardening YouTube Videos! - View
       
      QUICK GROWING CROPS for a FALL & WINTER Garden - View


      Most Popular Seeds to Plant for a Fall/Winter Harvest:


      Arugula:
      arugula seeds

      Beans (Bush): bean seeds

      Beets: beet seeds

      Mustard Greens: mustard seeds

      Broccoli: broccoli seeds

      Cabbage: cabbage seeds

      Cauliflower: cauliflower seeds

      Chard: chard seeds

      Chicory: chicory seeds

      Cilantro: cilantro seeds

      Collards: collard seeds

      Radish: radish seeds

      Dill: dill seeds

      Kale: kale seeds

      Lettuce: lettuce seeds

      Peas: pea seeds

      Scallions & Bunching Onions: scallion seeds

      Spinach: spinach seeds

      Turnip: turnip seeds 
      NEW PRODUCT!  All-in-One Fall/Winter Seed Bank]]>
      https://www.extensionsbychristy.com/blogs/news/seed-saving-tips 2020-06-16T08:30:00-07:00 2021-08-30T20:52:56-07:00 SAVE YOUR SEEDS!! - Tips & Tricks - Alex Alex

      Saving your own heirloom garden seed year after year can be very rewarding! Here are 4 important tips on how to get started saving your own garden seeds:

      Seed Saving TIP #1  
      When saving your seeds, make they are open-pollinated heirloom (non-hybrid) seed varieties. These are the only seeds you can save to produce true-to-type crops year-after-year!  

      Seed Saving TIP #2  
      Start with easy-to-harvest crops such as peas, beans, lettuce, peppers, and tomatoes! Each of these are annuals and self-pollinating. Plus, you will only need a few plants to reap a decent harvest of seed.  

      Seed Saving TIP #3  
      Curious as to when it’s time to harvest? For crops with wet fruits, you’ll need to leave a few fruits on the plant to fully mature in the garden. If you're harvesting from dry fruited crops such as grains, lettuce, or beans… they can be removed from the plant once the seeds are dry and hard.  

      Seed Saving TIP #4  
      Always store your garden seeds in a cool, dark, and dry place. These seed vaults are the PERFECT solution for long term seed storage. Place your properly dried seeds into the airtight container and store it in the refrigerator or freezer for several years!  


      💰SAVE MONEY  🥗 EAT BETTER  ❤️ PRESERVE GENETIC DIVERSITY  🐝 SAVE THE BEES  💪 BECOME SELF-SUFFICIENT  👨🏽‍🌾 SHARE WITH YOUR COMMUNITY  🌎 CONNECT WITH NATURE


      ]]>
      https://www.extensionsbychristy.com/blogs/news/what-is-diatomaceous-earth 2020-05-25T08:37:00-07:00 2021-08-30T20:52:57-07:00 What is Diatomaceous Earth (DE)? How does it work as an Insect / Pest Repellent in the garden? Alex Alex

      Diatomaceous Earth (DE) is a naturally occurring soft sedimentary rock that is crumbled into a fine white powder.

      How does DE work in your garden? 

      • It works at killing insects because the microscopic particles are very sharp and as an insect crawls over it, it gets cut.

      • It also can stick to the insect causing it to dry out.

      • It is very effective against slugs, beetles, worms, fleas, mites, spiders, and MORE!

      • It is completely NON-TOXIC!  Why?  Because it harms insects physically, and not chemically. It is very safe for your garden.

      💡IMPORTANT: Please remember to wear a mask as to avoid breathing in the tiny dust particles.

      Have you tried Diatomaceous Earth in your garden?

      Learn more about ORGANIC PEST CONTROL here: https://www.extensionsbychristy.com/blogs/news/natural-pest-control

      ]]>
      https://www.extensionsbychristy.com/blogs/news/full-sun-partial-shade 2020-04-22T11:36:00-07:00 2021-08-30T20:52:58-07:00 FULL SUN or PARTIAL SHADE - PLANTING TIP Alex Alex If You Grow it for the Fruit or the Root = YOU NEED FULL SUN.  If You Grow it for the Leaves, Stems, or Sprouts = ALL YOU NEED IS PARTIAL SHADE

      More

      ]]>
       

      If You Grow it for the Fruit or the Root = YOU NEED FULL SUN 

      If You Grow it for the Leaves, Stems, or Sprouts = ALL YOU NEED IS PARTIAL SHADE

      ]]>
      https://www.extensionsbychristy.com/blogs/news/make-your-own-garden-plant-markers 2020-04-10T14:13:00-07:00 2021-08-30T20:52:59-07:00 MAKE YOUR OWN GARDEN PLANT MARKERS Alex Alex

      Here are some of our favorites that we stumbled upon on Instagram. 

      1. Painted Spoons with Text via @thekingstonhome

      2. Painted Rocks via @valutree1

      3. Copper Printed via @rubygirljewelry

      4. Wooden Painted via @sherellech

      5. A rainbow of Spoons via @ntaladay

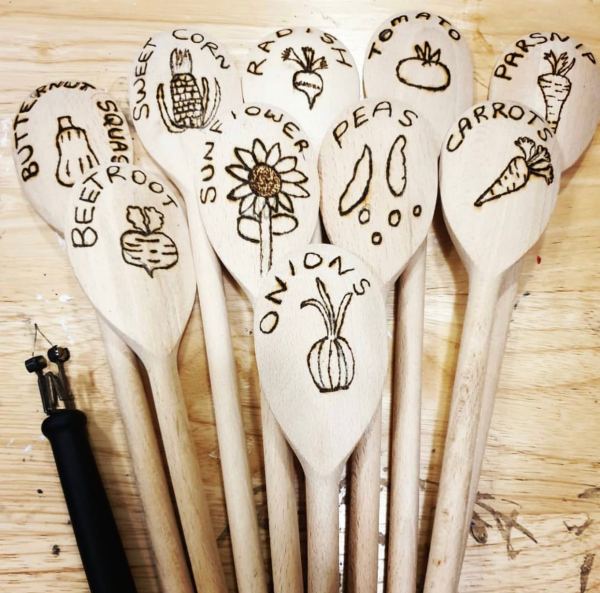
      6. Woodburned Spoons via @georgiemakes

      7. Painted Wooden Spoons via @homeandhorizon

      8. Popsicle Markers via @hoffeeandanuffin

      9. Painted Rocks via @openartedbylaurenbrenner

      10. Rocks on Sticks via @scintillabysomita

      11. Tape Labels via @theurbangardeness


      ]]>